




Cleaning your vinyl records is the single cheapest upgrade available to a turntable owner. No cartridge change, no new deck, no cables. Just the removal of everything sitting between your stylus and the music.
This guide covers what is actually on a dirty record, which cleaning method suits your collection and budget, how often to clean, and the mistakes that do more harm than the dirt.
Why Cleaning Vinyl Records matters
Records collect dust, dirt and airborne contaminants from the moment they leave the press. When the stylus tracks a groove, it is working at a scale where all of that matters.
The contact patch between stylus and groove wall is a few square microns. Spread a 2 gram tracking force over that area and the contact pressure runs to tonnes per square inch. At those pressures a speck of dust is not a speck. It is either an obstacle the stylus has to climb, which you hear as a click, or a grinding compound held against the groove wall, which you do not hear until the damage is permanent.
That is the whole argument for record cleaning. Everything below is detail.
What is actually on a dirty record
Different contaminants need different methods, which is why no single tool cleans everything.
- Airborne dust. Loose, sits on the surface, lifts off with a dry brush before play. The easiest problem and the most common.
- Static-bound dust. The same dust, held electrostatically. A carbon fibre brush drains the charge as it lifts the dust, which is why carbon fibre rather than any old brush.
- Mould release compound. Residue from pressing, present in the grooves of many new records. Dry brushing will not touch it. This is why new records benefit from a wet clean.
- Fingerprint oils. Transferred from handling, and they hold everything else in place. Needs a solvent action, which means wet cleaning.
- Paper fibres. Shed by paper and card inner sleeves, then pressed into the groove by the stylus.
- Mould and mildew. On records stored damp. Visible as haze or spotting, and it needs wet cleaning to remove.
- Ingrained grime. Decades of the above, compacted by playing. This is the category that justifies ultrasonic or vacuum machines.
How dirty records affect sound quality
Debris on the record surface interferes with the stylus as it moves through the groove. Even small particles disrupt tracking and mask fine detail.
Clean records typically give you:
- Lower background noise
- Fewer pops and clicks
- Better instrument separation
- Improved dynamics
- More stable tracking
The change is most obvious on quiet passages and record ends, where surface noise sits closest to the music and where tracking is hardest.
Protecting your stylus and your records
Contamination does not stay on the record. Dust and fibres transfer to the stylus during playback and build up there.
That build-up becomes abrasive, and it increases wear on both the stylus tip and the groove walls. In bad cases it causes mistracking and audible distortion. Anyone who has read our guide to cleaning a turntable stylus will recognise the loop: dirty records make dirty styli, dirty styli damage records.
Clean records break that loop at the source. It is the reason stylus cleaning becomes a five second job for people who clean their vinyl properly.
Should you clean brand new vinyl?
Yes, and this surprises people.
New records are not clean. The pressing process leaves mould release compound in the grooves, and packaging adds its own dust. A record can be sealed, unplayed and still need a wet clean before its first play.
A careful clean before the first play removes those residues and gives the stylus a clean surface from the very beginning, which matters most on a record that has never had contaminants pressed into the groove by a stylus.
How to clean vinyl records: choosing a method
Methods run from a brush costing less than a record to machines costing more than most turntables. The right one depends on collection size, condition, and how much of your listening time you want to spend cleaning.
Always follow the manufacturer’s guidelines for any tool or fluid you use.
Dry cleaning: brushes and pads
Cost: roughly 8 to 12 GBP. Use: before every side.
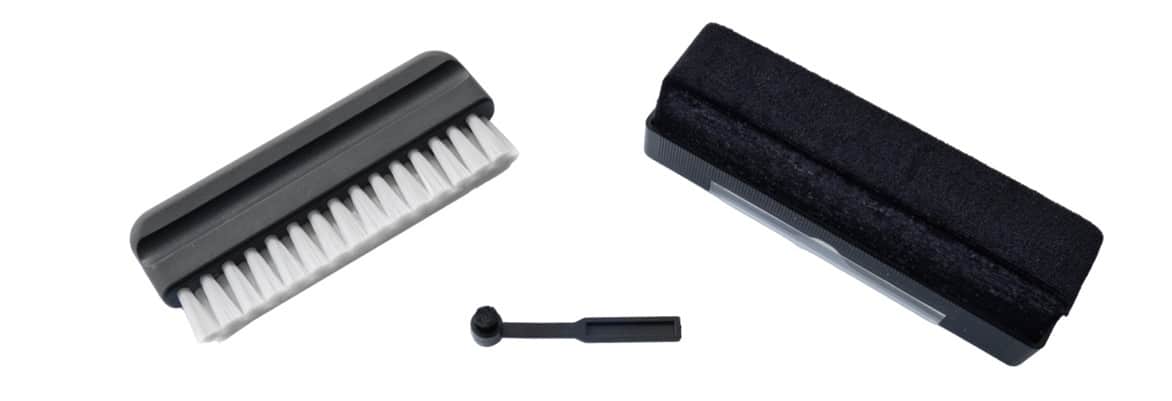
The routine habit. An anti-static carbon fibre brush, a velvet pad or a microfibre cloth lifts surface dust while the record turns on the platter.
How to do it:
- Inspect the record first under good light. Remove any visible loose particles gently before you start, so you are not dragging grit through the grooves.
- With the platter turning, hold the brush lightly against the surface and let two or three rotations pass.
- Draw the brush slowly outward to the edge to carry the dust off the record rather than depositing it back.
- Brush the stylus if fluff has accumulated from previous plays.
Dry cleaning removes loose and static-bound dust. It will not remove fingerprints, mould release or ingrained grime, and no amount of brushing will make it do so.
Wet cleaning: fluids and water
Cost: 7 to 20 GBP per bottle of solution. Use: first play of any record, then as needed.
Wet cleaning dissolves what brushing cannot lift. It is the difference between removing dust and actually cleaning a record.
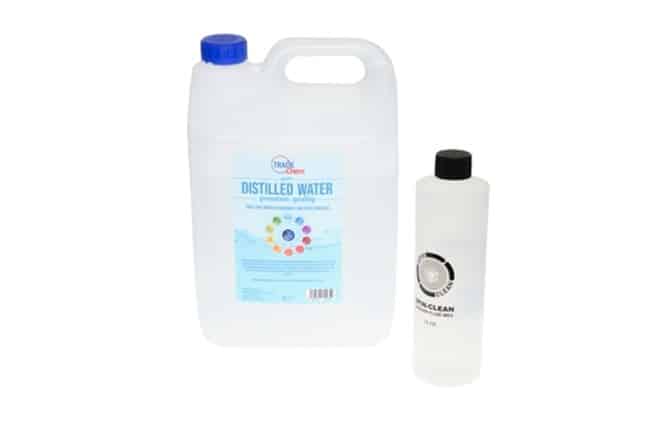
Always use distilled water. Not tap, not bottled, not filtered, not ionised. Tap and bottled water carry dissolved minerals that stay behind in the groove when the water evaporates, leaving deposits exactly where you were trying to clean. Distilled water is cheap and available in bulk online.
On solutions: machine manufacturers recommend and sell their own, usually supplying a starter bottle. Proprietary solutions are formulated to dissolve oils, fingerprints and ingrained dirt without attacking the vinyl, and they include a surfactant that reduces the water’s surface tension so it can reach into the groove rather than sitting on top of it.
Enthusiast formulas circulate widely online. Some are sound, some are not, and the wrong mix causes long term damage that is invisible until it is not. Stick to trusted sources.
Some manufacturers advise mixing the surfactant into the water; others suggest applying it to the record surface directly. Follow the instructions for the product you have bought rather than mixing approaches.
Manual cleaning machines
Cost: 50 to 100 GBP. Use: whole collections, deep cleaning.
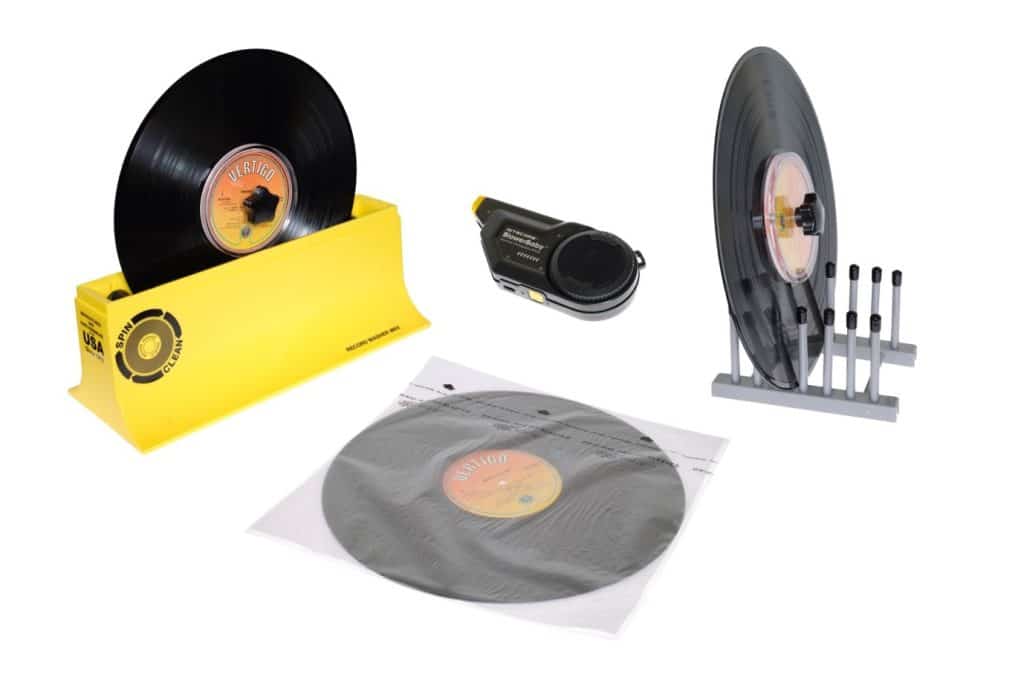
The practical middle ground. A tank, rollers or a clamp to hold the record, and brushes or pads that clean both sides as you rotate it. The SpinClean Record Washer MkII and SPINCARE machines are established examples.
How to use one:
- Fill the tank with distilled water and solution to the marked level. Do not overfill.
- Fit the record and rotate it several times in both directions.
- Keep water off the label. A record label protector or clamp, around 20 to 30 GBP, makes this straightforward and helps you handle the record.
- Remove and dry.
Drying matters as much as washing. Use a lint-free cloth in a circular motion following the groove, then let the record air dry completely before sleeving or playing. A drying rack designed for records, with no sharp edges, is worth having. Domestic dish racks are not suitable. Some owners use a low-speed fan such as the Nitecore BB2 to speed the final drying.
Automated Record-cleaning machines
Cost: 100 GBP to 2,500 GBP and beyond. Use: large collections, difficult records.
These automate the process using vacuum suction, ultrasonic cavitation, or both, along with automated rotation and controlled fluid application. At the top end sit machines such as the Degritter and the SME Loricraft.
They earn their money on two things: consistency, and reaching contamination that manual methods cannot. Ultrasonic cleaning in particular works inside the groove rather than across the top of it, which is where the ingrained grime on secondhand records actually sits.
Whether that justifies the outlay depends entirely on how many records you own and what condition they arrived in. For a collection largely bought new, a manual machine and good sleeves will do most of the work.

Sleeves: the step people skip
Cleaning a record and returning it to a paper sleeve undoes the work immediately. Paper and card sleeves shed fibres straight back into the groove.
Use anti-static, archival quality inner sleeves. The MoFi Original Master sleeves and their equivalents are non-scratching, anti-static and resist mould. At roughly 0.50 to 1.00 GBP each depending on quantity, they are one of the highest-value purchases in vinyl care, and there is no point owning a cleaning machine without them.
Store records vertically, never stacked flat, and away from damp and direct heat.
How often should I clean my records?
It depends on storage conditions, how often you play them, and what state they are in. As a working routine:
- Dry brush before every side. The habit that prevents most problems.
- Wet clean once before first play for any record that is new to you, whether bought new or secondhand, unless you know it has been cleaned.
- Wet clean again as needed, judged by noise and visible condition rather than a schedule.
- Clean the stylus regularly so you are not reapplying contamination to clean records.
- Re-sleeve into anti-static sleeves at first clean, once, and the job stays done.
One honest limit: cleaning removes contamination and reveals detail that was buried under it. It does not repair scratches, groove damage or worn pressings. A record damaged by a mistracking stylus stays damaged.
Frequently asked questions
How do you clean vinyl records at home? Dry brush with a carbon fibre brush before each play, and wet clean with distilled water and a proper record cleaning solution when a record is new to you or sounds noisy. A manual cleaning machine makes wet cleaning practical for a whole collection.
Can you clean vinyl records with water? Only distilled water. Tap, bottled and filtered water leave mineral deposits in the groove as they dry. Water alone also struggles without a surfactant, which is what record cleaning solutions provide.
Can you use washing up liquid on vinyl records? Not advisable. Household detergents contain additives, perfumes and rinse agents that leave residue in the groove and can attack the vinyl over time. Use a solution formulated for records.
Should you clean brand new records? Yes. New records carry mould release compound from pressing and dust from packaging, neither of which a dry brush removes.
How often should you clean vinyl records? Dry brush before every side. Wet clean once before the first play of any record new to you, then only when noise or condition suggests it.
Does cleaning records remove scratches or clicks? It removes noise caused by contamination, which is most of it on a dirty record. It cannot repair physical groove damage, so clicks that survive a thorough clean are usually damage rather than dirt.
Is ultrasonic cleaning safe for vinyl? Machines designed for records run at frequencies and power levels chosen for vinyl and are widely used without issue. Improvised ultrasonic tanks intended for jewellery or parts are a different matter and are not worth the risk to an irreplaceable pressing.
In short
Dry brush before every side, wet clean anything new to you, sleeve everything properly, and keep your stylus clean so the loop stays broken. Most of the noise people accept as part of vinyl is contamination, and most of it comes off.
This page is a general guide to cleaning vinyl records. Follow the manufacturer’s instructions for any product you use, proceed at your own risk, and if in doubt, ask your dealer.
Learn about our SERENE upgrade range:
SERENE Record Mat: www.stackaudio.co.uk/serene-mat
SERENE Record Stabiliser: www.stackaudio.co.uk/serene-stabiliser

 EN
EN  DE
DE  NL
NL  FR
FR  JA
JA  PT
PT  ES
ES  SV
SV  IT
IT  FI
FI