



“Why should I clean my stylus? – my vinyl sounds great!“

A neglected stylus before and after cleaning
Your turntable stylus is the smallest component in your system and the only one that touches the record. Everything you hear passes through a contact patch measured in microns. Anything sitting in that patch is in the signal path.
Cleaning your stylus, or needle as it is often called, is not housekeeping. It protects the records you already own, and it is the cheapest performance you will ever recover from a record player.
This guide covers why a dirty stylus matters, how to inspect one, how to tell dirt from wear, and which cleaning method to use.
What happens when a turntable stylus gets dirty
The stylus tip contacts the groove wall over an area of a few square microns. The tracking force spread over that area produces contact pressures in the region of tonnes per square inch. That is the reason a 2 gram tracking force can do real work, and the reason anything caught between the tip and the vinyl matters far more than its size suggests.
Debris in that gap does three things.
It lifts the stylus out of correct contact. A layer of dust acts as a spacer. The tip no longer sits in the groove at the geometry it was designed for, so it stops reading the fine modulation that carries detail and spatial information. This is why a dirty stylus sounds dull and vague rather than obviously broken.
It becomes an abrasive. Dust is largely mineral. Held against the groove wall under those pressures and dragged along at playing speed, it cuts. The damage is permanent and it is on your records, not just your stylus.
It gets baked on. Friction at the contact point generates real heat over the length of a side. Soft residue that would have brushed off after one record can polymerise into a hard deposit after twenty. This is why regular light cleaning is easier and safer than occasional heavy cleaning.
What builds up on a stylus
Not all of it is dust, and the differences matter when you choose a cleaning method.
- Airborne dust. Mineral and fibrous, arrives between plays, brushes off easily when fresh.
- Vinyl shed. The record itself sheds material as it plays. It is soft, it accumulates as a pale collar around the tip, and it is the most common thing people see under magnification.
- Mould release compound. Residue from the pressing process, present on many new and sealed records. Sticky, and it grabs dust.
- Smoke, cooking residue and airborne oils. Tacky films that dry hard. Common in rooms where the turntable lives with everyday life.
- Fluff and fibres. Usually from sleeves, brushes and clothing. Wraps around the cantilever rather than the tip.
Dry dust needs almost nothing. Baked-on residue and mould release need a method with more bite. Fibres are best lifted off rather than brushed along.
How to inspect a turntable stylus
Cleaning blind is guesswork, and inspecting a stylus takes seconds once you have the habit.
A bright light and a loupe will show you an obviously loaded tip. A 10x jeweller’s loupe costs very little and is enough to answer “does this stylus need cleaning”.
A phone macro lens or clip-on macro gets you further, and lets you photograph the tip so you can compare it over time.
A USB microscope at 200x or more shows the tip profile properly. This is the same tool used for setting stylus rake angle, so if you have read our guide to VTA adjustment and fancied trying microscope-based SRA setting, one purchase covers both jobs.
What a stylus looks like when it is:
- Clean: a bare tip, groove-facing edges bright, cantilever clear of fibres.
- Dirty: a grey or white collar sitting behind and around the tip, or a visible bead on the leading face.
- Worn: flats or facets on the contact edges rather than deposits. No amount of cleaning fixes this one.
Dirty stylus or worn stylus? They sound the same
This is the most common confusion in stylus care, and it leaves people cleaning a stylus that needed replacing six months ago.
A dirty stylus and a worn stylus produce nearly identical symptoms: sibilance on vocals, loss of fine detail, a harder edge to the treble, and mistracking on heavily modulated passages. The difference is that cleaning fixes one of them.
Rule of thumb: if a careful clean restores the sound, it was dirt. If a careful clean changes nothing, look at wear.
How long a stylus lasts varies a great deal with tip profile, tracking force, record cleanliness and setup accuracy. As broad guidance, conical and elliptical styli are commonly quoted at several hundred to around a thousand hours, and advanced line contact profiles considerably longer. Treat any number as a prompt to inspect, not an expiry date. Manufacturer guidance for your specific cartridge beats any general figure, including these.
A worn stylus does not fail politely. It carries on playing while it damages records, which is the real argument for inspecting rather than assuming.
The one stylus cleaning rule that matters
Always clean back to front, in the direction of stylus travel.
The cantilever is suspended so that it moves in the groove’s directions. It does not take side loads or rearward loads well, and the suspension is the part that gets damaged, not the tip. A stylus brush pushed sideways or backwards can bend a cantilever or shift its alignment permanently.
Everything else is a variation on gentle. Rest nothing on the armtube, use light pressure, and never rush a movement near the cartridge.
What should I use to clean my stylus?
Several stylus cleaning methods work. They are listed here roughly from the safest to the most cautious, rather than by price. Prices are indicative UK retail as of August 2026.
Whichever you choose, handle the tonearm carefully. It is one of the most delicate parts of a turntable and a slip costs more than any cleaner on this list.
Magic eraser
Melamine foam blocks, sold as Magic Eraser and similar, get recommended widely as a cheap way to clean a stylus because they visibly work.
They work because melamine foam is a micro-abrasive. It cleans surfaces by sanding them at a very fine scale. That is the mechanism, and it is worth understanding before applying one to a diamond mounted on a suspended cantilever. A number of cartridge manufacturers and dealers advise against it for this reason.
If you use one anyway, and plenty of people do without incident: cut a small piece and set it on a stable surface at cueing height, lower the stylus in and lift it straight out with no dragging, never wet it, and avoid any version with cleaning agents already in the foam. Around 8 GBP.
Our position is that a gel pad does the same job by adhesion instead of abrasion, for a one-off cost that is not much higher. That is where we would spend the money.

Liquid Stylus Cleaners
Typically 7 to 12 GBP per bottle, and the subject of long-running debate.
The concern is real but often overstated: fluid wicking up the cantilever can reach the cartridge suspension and, in older designs, the adhesive holding the stylus to the cantilever. The mitigation is straightforward. Use the smallest amount that works, apply it to the brush rather than flooding the tip, keep the fluid off the cantilever, and let the tip dry before playing.
Where liquid stylus cleaner earns its place is on residue a brush and a gel pad will not shift, particularly mould release and dried films. Occasional use, not routine use. Check your cartridge manual first, as some manufacturers specify their own fluid or advise against liquids entirely.

Carbon Fiber stylus brush
The everyday option, and the one most owners should use most of the time. Prices sit in the region of 5 to 15 GBP.
Move the brush back to front across the tip with light pressure, two or three passes. That is the whole method. It removes fresh dust and loose vinyl shed, and it takes about five seconds before a side.
Many stylus brushes come with a fluid. You do not have to use it, and the brush works dry for routine cleaning. Check your cartridge manual before applying any fluid.

Stylus tip dry cleaning system
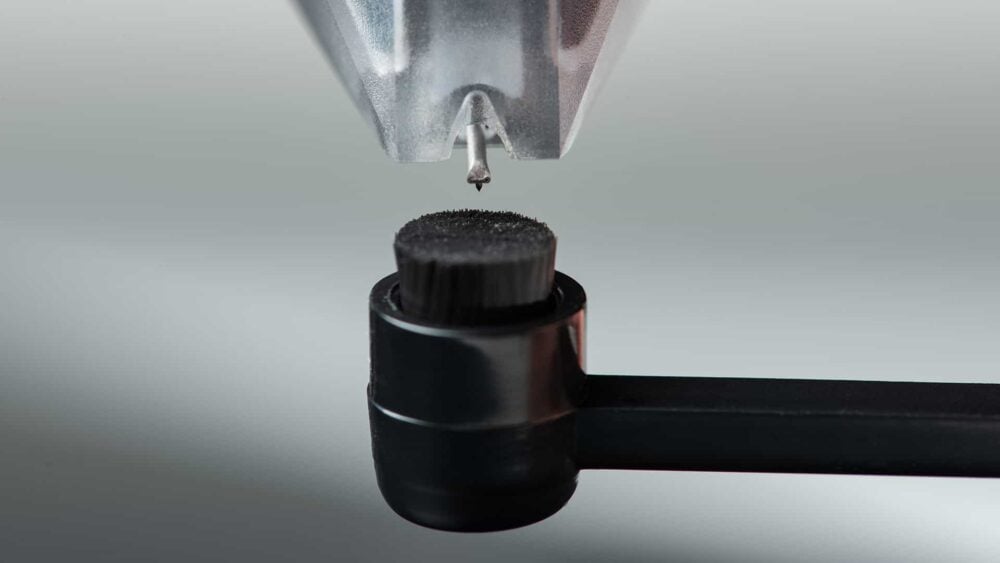
The One-touch polymer stylus tip dry cleaning system is a convenient and affordable solution for keeping your turntable stylus clean. Priced at approximately 25.00GBP, this innovative tool offers a safe and easy way to maintain your stylus’s performance. With its user-friendly design, the process is straightforward.
Simply position the tonearm within easy reach of the polymer, carefully lower the cartridge until the stylus needle is inserted into the polymer, and then gently lift it back up. As you do so, the dirt adheres to the polymer surface, leaving your needle clean and ready for optimal playback. The beauty of this system lies not only in its effectiveness but also in its longevity. The washable polymer itself is designed to last well over five years, ensuring you get great value for your money. With its reasonable price point and durable construction, the One-touch polymer stylus tip dry cleaning system is a great accessory for any vinyl enthusiast.

Ultrasonic Stylus cleaner
The premium option, roughly 45 to 120 GBP.
Position the device under the tonearm, lower the stylus onto the pad, and run the cycle, typically around fifteen seconds. Cleaning happens through vibration in the fluid rather than contact, so nothing touches the tip.
An ultrasonic stylus cleaner is effective and safe in use. Whether it earns the money over a good gel pad is a fair question for most systems, and the honest answer is that it depends more on how dirty your records are than on how expensive your cartridge is.

How often should I clean my stylus?
There is no universal schedule, but the habits below cover most situations.
- Brush before each side. Five seconds, dry, back to front. This is the single habit that makes everything else rare.
- Inspect weekly, or after any dusty record. Loupe or magnifier, a few seconds.
- Deeper clean every 10 to 15 hours of play, or immediately after playing a record you know was dirty.
- Wet clean occasionally only. When dry methods stop working, not as routine.
- Do not overclean. Repeated aggressive cleaning wears the cantilever suspension. Gentle and frequent beats thorough and rare.
- Cover the turntable when not in use. Most of what lands on a stylus lands while nothing is playing.
- Log hours roughly if you are serious. It turns stylus replacement from a guess into a decision.
Clean records mean a cleaner stylus
Almost everything on your stylus came off a record. Cleaning styli is treating the symptom; cleaning records is treating the cause.
A record that has been properly cleaned sheds far less onto the tip, and a stylus that stays clean tracks accurately for longer and does less damage while it does so. Owners who clean their vinyl well find stylus cleaning becomes a five second brush before each side and very little else.
The same logic runs through the rest of the front end. Accurate setup, a stable platform and a well supported record all reduce the work the stylus has to do. It is the same argument we make about vibration, from the other direction.
Frequently asked questions
How often should you clean a turntable stylus? Brush it dry before each side, and give it a deeper clean roughly every 10 to 15 hours of play or straight after any visibly dirty record.
Can I clean a stylus with my finger? No. Skin oils are exactly the tacky residue you are trying to remove, and the side loading involved risks the cantilever.
Which direction do I clean a stylus? Back to front, in the direction of stylus travel, always.
How do I know if my stylus needs replacing rather than cleaning? If a careful clean restores the sound, it was dirt. If cleaning changes nothing and the symptoms persist across many records, inspect for wear or have a dealer look at it.
Is isopropyl alcohol safe on a stylus? Some stylus cleaners are alcohol based and many owners use them without issue, but concentration and quantity matter, and some manufacturers advise against alcohol reaching the cantilever or cartridge body. Use a product formulated for styli and follow your cartridge manual rather than improvising.
Do I need to clean a brand new stylus? Check it before first use. New records carry mould release compound, so a new stylus can pick up residue within its first few sides.
Does a dirty stylus damage records? Yes. Trapped debris is abrasive under the contact pressures involved, and the wear it causes to groove walls is permanent.
In short
Brush before each side, inspect regularly, deep clean occasionally, and keep your records clean so that none of it becomes a chore. A clean stylus reads the groove the way it was designed to, and it stops your collection wearing out faster than it should.
This page is a general guide to cleaning a turntable stylus. Follow your cartridge manufacturer’s instructions where they exist, proceed at your own risk, and if you are unsure, ask your dealer.
View our SERENE Turntable upgrade range:
SERENE Record Mat: www.stackaudio.co.uk/serene-mat
SERENE Record Stabiliser: www.stackaudio.co.uk/serene-stabiliser

 EN
EN  DE
DE  NL
NL  FR
FR  JA
JA  PT
PT  ES
ES  SV
SV  IT
IT  FI
FI